
All About Crochet Swatching

Today, I want to talk all about swatching, and how, when, and why you should always make a crochet swatch before making a garment from a pattern or designing your own!
Making a swatch is the bane of many crocheters, but it’s an important part of the process that you shouldn’t skip for many reasons. You might get lucky with skipping a swatch, but you might not, so making a swatch in the beginning will save you headaches later when crocheting a garment for yourself or to be gifted, because it can be so frustrating and disheartening to put in all the work of making a garment to find in the end that it won’t fit correctly. And making a swatch especially important and should not be skipped if you are designing a pattern to share or sell, because the information gleaned from making a proper swatch is useful and necessary for not only you as the designer, but for future makers of your pattern, as well.
Whether you’re a a newbie crocheter or a seasoned maker, I’m here to try and convince you to SWATCH before you start a new project. So let’s begin…
What is a Swatch?

A swatch is a small crocheted or knitted square of fabric used to measure gauge and estimate needed yardage. A swatch is typically a square measuring at least 4×4 inch (10×10 centimeter), but can be bigger if needed to create a full repeat of a special stitch pattern, such as a cable.
I typically make a swatch a little bigger than 4×4 inches since certain yarns or stitches can “shrink up,” and also because having a wider surface area allows you to measure inner stitches and not include those on the swatch edges, which can sometimes be uneven or skew the final stitch and row counts.
Why is it Important to Swatch Before Starting a New Crochet Project or Design?

So, why should you swatch?
One, it’s always helpful to make a swatch when trying out a new yarn, stitch, or new yarn and stitch combination. It allows you to get a feel for how the yarn behaves, it’s overall texture, stitch definition, and stretch level.
If you’re following a pattern, even if you have the same yarn and same sized hook as the designer uses for the pattern, don’t assume that your gauge will match. Gauge can differ really greatly between different crocheters so it’s important to make a swatch in the beginning to compare your gauge to the designer’s. That way you don’t end up with a garment that’s too large or small down the line. And if you’re worried about using up yarn for a swatch, you can always leave the swatch attached to the yarn ball and unwind it after measuring to use for the actual garment.

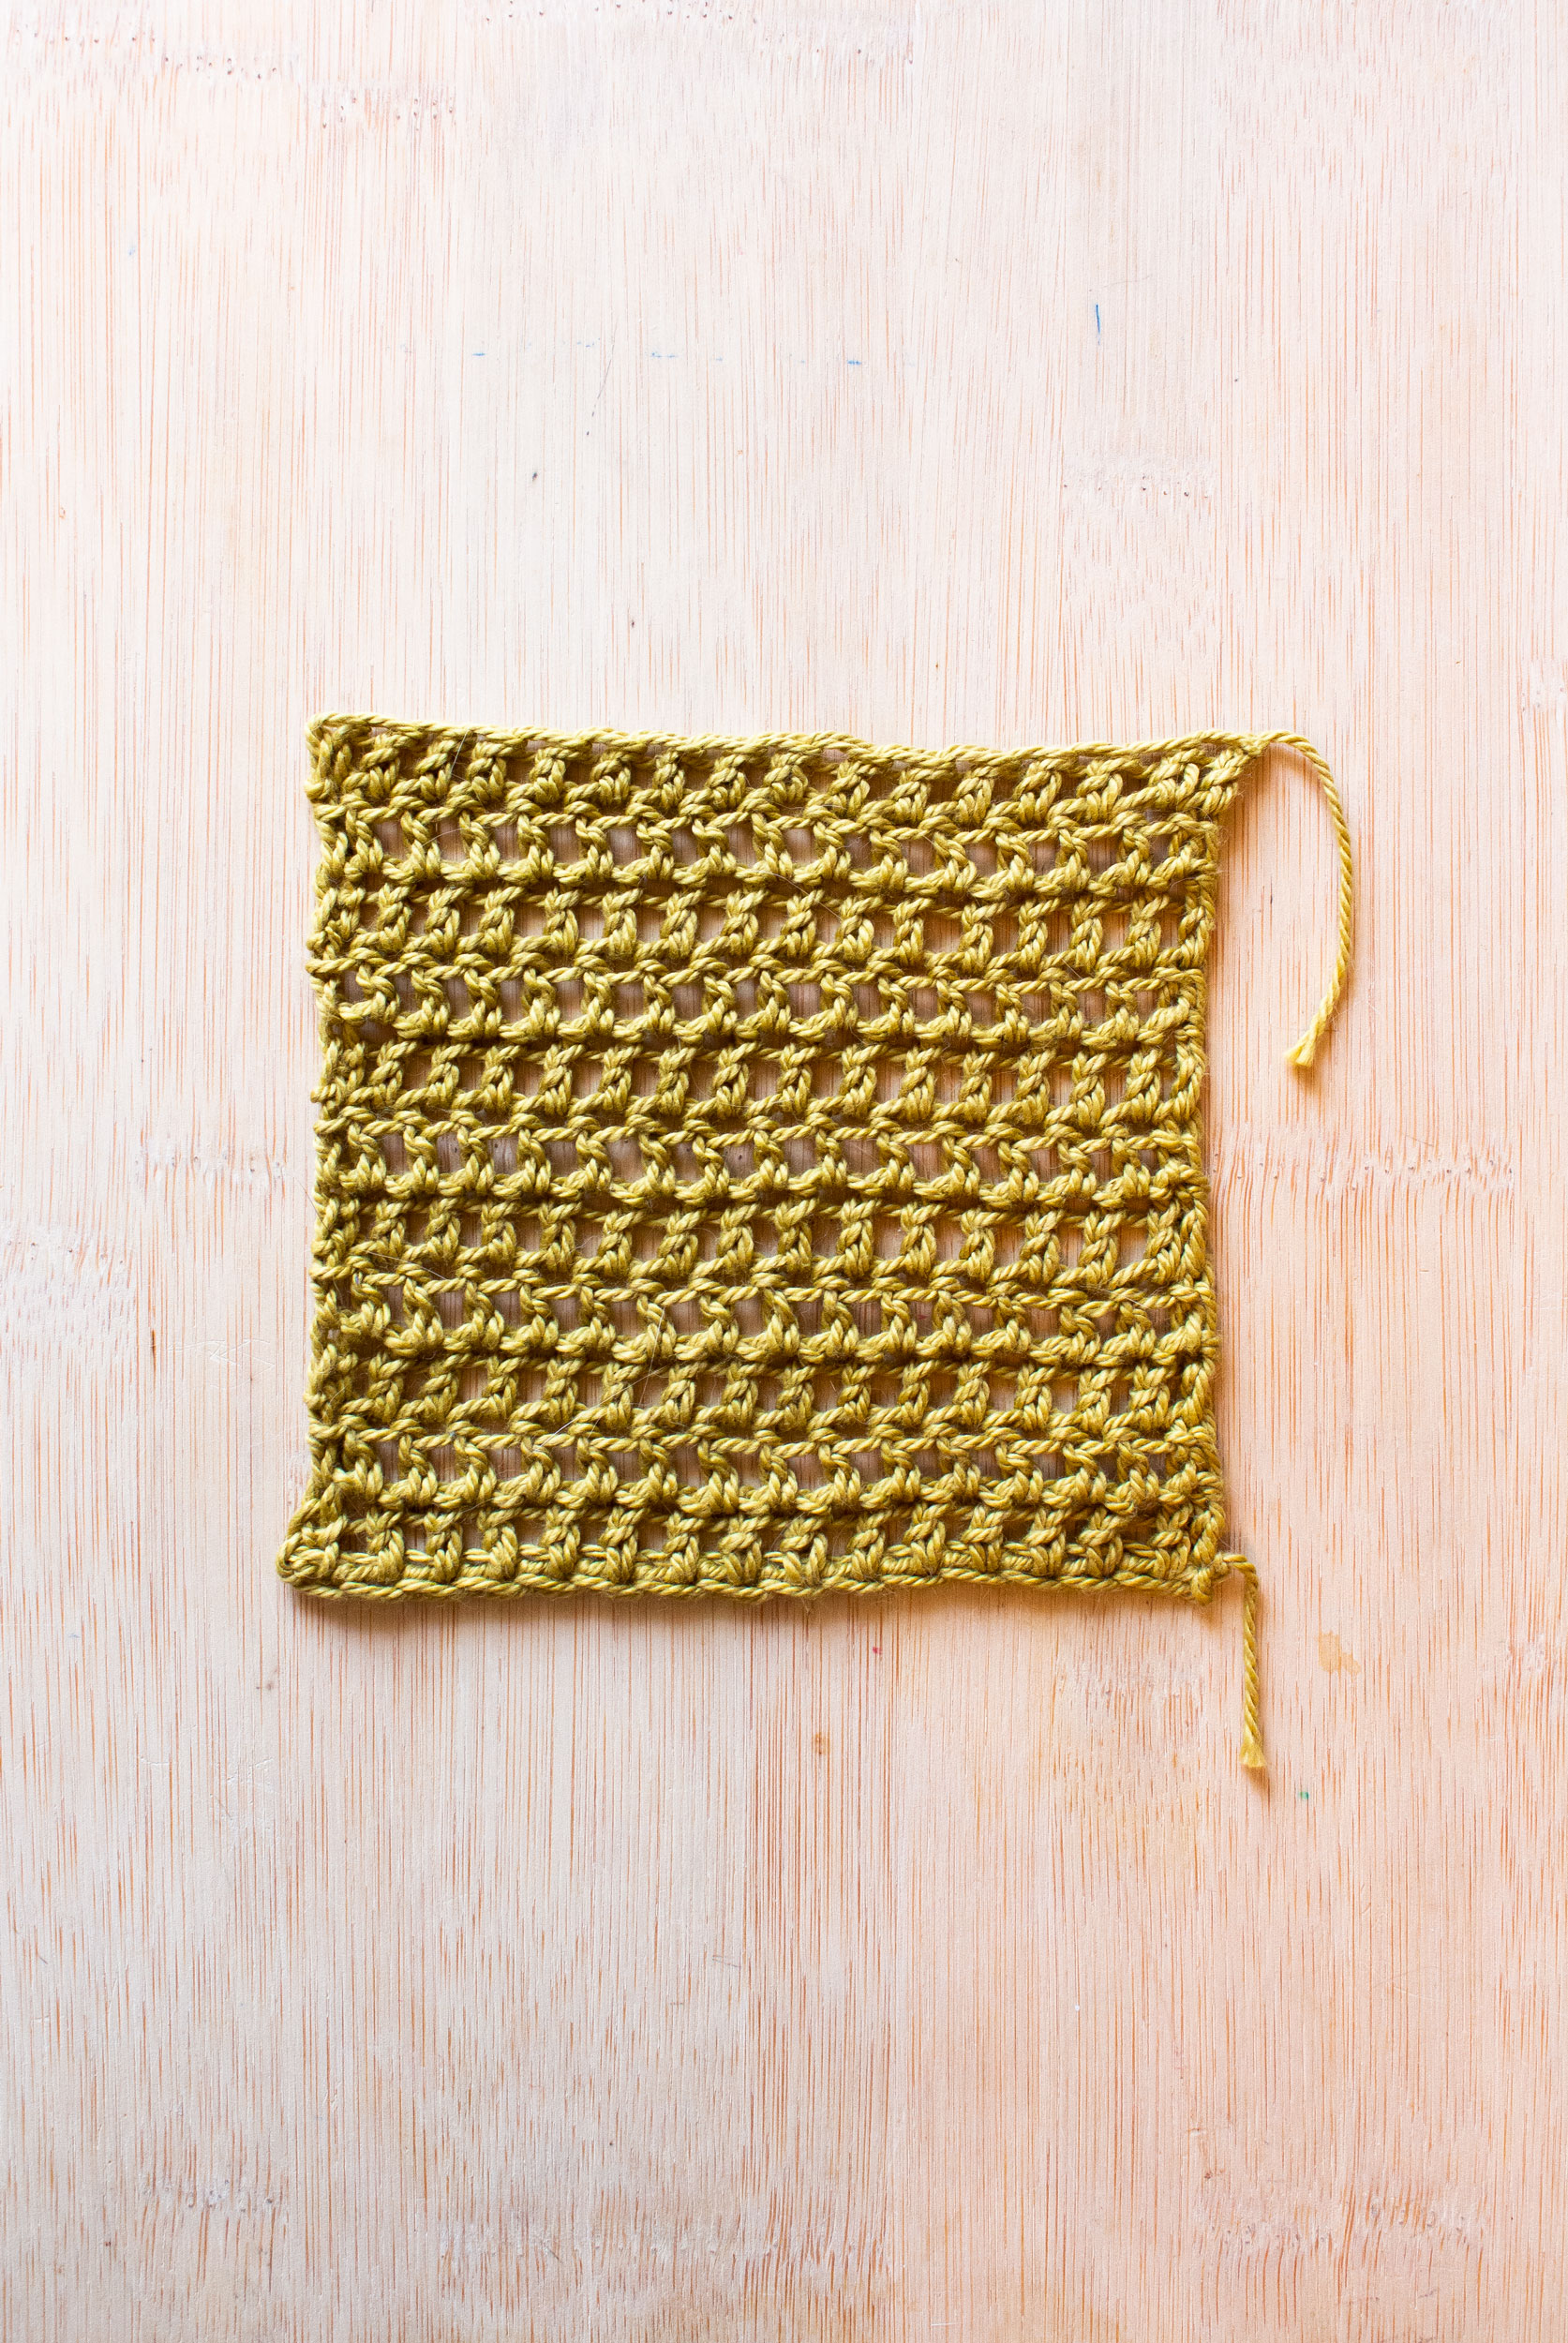
Also, don’t assume that just because two yarns are the same weight crocheted with the same hook size will have matching gauges. A yarn’s fiber content, inherent stretch or lack thereof can greatly effect gauge. For example in the picture above, the swatch on the left is made with 100% cotton yarn and is very structured with little stretch, while the swatch on the right it made with a wool-like acrylic and is very soft, smooshy, and stretchy, even though they’re technically the same weight, crocheted with the same sized hook and in the same crochet trellis stitch.

Along with that – and this is especially good for designers – hook size used can effect the finished crocheted fabric’s texture, drape, and “openness.” In the picture above, the same yarn is used for both swatches, but the swatch on the left is crocheted with a smaller hook and has a more dense, less drapey fabric than the swatch on the right, which is crocheted with a larger hook and has a much more drapey, open, lace-y texture.
If you are designing a pattern with the intent to share on a public platform, such as a blog, or sell, it’s ESPECIALLY important to make a swatch for each stitch or stitch pattern that will be used in your design. This is important for two major reasons:
1.) You will need to know the stitches – or stitch pattern repeat – and row counts if you are grading your design for multiple sizes.
2.) You need to be able to give your customers and pattern makers information such as gauge and estimated yardage so they can make an informed decision about what yarn/yardage/hook size they will need to make your pattern.
And, whether you’re a designer or not, swatches can also serve as an easy way to catalog yarns that you’ve used. I currently keep all my swatches from past designs in a binder (I’ll probably switch to an accordion folder or box/drawer of some kind eventually, since I’m running out of space). I put all the swatches I have for each yarn type in a plastic sleeve together with a piece of paper behind that has notes on my personal pros and cons of that yarn, such as whether it’s soft or scratchy, squishy or non-stretch, and what type of projects it would be best suited for, such as a stiffer yarn for homeware or a soft, drapey yarn for garments.
How Do You Block a Swatch?

Second to the importance of making your swatch, is blocking it. Blocking a swatch allows you to see how the yarn “blooms,” or opens up.
The swatches in the picture above are crocheted in the same yarn with the same sized hook, but the one on the left is unblocked. Notice how the stitches are tighter and closer together and how the swatch is smaller in width and height compared the the blocked swatch on the right, which has more open space between each of the stitches and is about a full inch wider and taller than the unblocked swatch.

While there are several methods for blocking, wet blocking is the most common. The simplest thing to do is wet your swatch with cool water – especially if the yarn contains wool, so you don’t felt it – but you can also add a wool wash or detergent if you will be using that on the final garment, as well. (I use this wool soap from Twig & Horn for wool yarns and like it a lot – not affiliated. I haven’t tried all the scents, though).
Then, you need to pin your swatch to a surface of some sort. You can see in the picture above I’ve pinned my swatch to a corkboard on the wall, but most people use blocking boards like these. Blocking boards are made of a thick foam and are extra helpful because they include a grid to aid in even, correctly sized blocking. You’ll need to make sure you stretch the swatch out a bit to open up the stitches, but not so much that they’re overstretched. Just work with the yarn and stitch pattern’s natural give.

You can use thumbtacks to pin your swatch like I have for the corners above (this works well when pinning to the sturdy corkboard), but most commonly people will use knit blockers or t-pins (these especially work better on the foam blocking boards mentioned above). As you can see in the pictures, knit blockers are long with several thin needle-like points and help keep a section of edge straight and even.
Once your swatch, or swatches if multiple are needed, are dry, you can unpin them and use them to find your gauge and yardage.
How Do You Measure a Swatch and Use it to Find Gauge?

To find gauge using your swatch a square ruler is not necessary, but is helpful. I use the one pictured above, from Twig & Horn – not affiliated. To use a square gauge ruler, line up you swatch within the center square so that the base of a row lines up with the bottom center edge. Count how many rows you have in 4 inches (10 centimeters), then count how many stitches – or stitch patterns, such as shells – in 4 inches (10 centimeters.
When counting stitches per 4 in (10 cm), I find it helpful to count the stitches from several rows to compare, as some rows will be slightly unaligned to the ruler’s edge. Use the best or most average number of stitches for you equations.
To calculate rows and stitches per inch (I’ll be using inches, but the equations are the same when using centimeters):
Say you have 9 rows per 4 inches: 9 divided by 4 = 2.25 rows per inch, and 12 stitches per 4 inches: 12 divided by 4 = 3 stitches per inch.
If you’re using a swatch that includes shells or another repeating motif, you could calculate shells per inch instead of stitches.
See this post for more info on how to use these numbers when designing a crochet garment pattern. If you’re checking your gauge when following a pattern, just compare the numbers from your swatch to those listed by the designer in the pattern.
How Do You Use a Swatch to Estimate Yardage?

To use your swatch to estimate yardage, after blocking and measuring your swatch, carefully unravel a section of your swatch and measure how many inches (or centimeters) of yarn there are within that section. What section you choose is up to you – I typically unravel the amount of stitches per inch, or pattern repeat per inch. You could also unravel 4 inches (10 centimeters) worth, especially if a full stitch motif repeat is more than 1 inch wide.
If unraveling 1 inch’s worth of yarn, take the length of that unraveled yarn and multiply it by the number of rows per inch: 13 x 2.25 = 29.25 yardage per square inch.
If unraveling 4 inch’s worth, divide that number by 4 to find the yardage per inch, then follow the same process as above. You can use same equations with metric instead of standard.
If you’re designing a garment pattern in multiple sizes, you can use this method to estimate yardage needed for each size by multiplying this yardage per square inch number with the finished garment measurements for each size. And it’s always best to round up. Some designers will even calculate in a small percent (like 5-10%) of the total yardage into the final yardage. It’s always better to have a little extra yarn leftover than not quite enough to finish a garment.
If you’re following a garment pattern estimated yardage should typically be listed, but you can use this yardage per inch number along with the given finished garment measurements in the pattern to doublecheck the given estimated yardage against your own gauge swatch calculations.
And those are the basics! If you have any questions, drop them in the comments or shoot me an email. I’m happy to try and help.
I hope this guide to all things swatches and swatching will help you consider making it a regular part of your designing and making process! What do you think?
